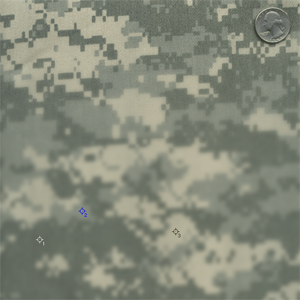
What’s up everybody, this is the first tutorial I’ve ever posted anywhere. Let me know what you think. This digital camo tutorial isn’t perfect, but there aren’t too many good versions that I’ve found online.

Nasty Mess
Step 1. Create a new Grayscale document at 2”x2.5” at 72 DPI. Fill it with some kind of messy pattern or scatter brush. Use a white background and brush something on top of it in black and 55% black. Do any combination of blurs or effects to your pleasing, just make sure there is a good range of shades. Only use black, white and gray. Typically, camouflage patterns use about 3 different colors.

Sampled Colors
Step 2. Next we’ll have to add our own swatches for the color of the camouflage. You can use any color you want, but as an example I’ll be using a sample I found online.
We’re going to add some Gausian Blur to get some nice even colors. Typically,
there are only 3 colors you’re going to be sampling. You’re going to have a light color, dark color and a middle color. Use the Eyedropper tool to sample and add these colors to your swatch list. Do this by choosing the Eyedropper tool, clicking on your color, then click the New Swatch button at the bottom of your Swatches palette.

Indexed Image
Step 3. Go back to your original file. We’re going to convert the image to Index Mode by going to Image>Mode>Index. Use these settings:
Palette: Local (Perceptual)
Colors: 3
Forced:
Custom… (Click on the first 3 swatches and replace these
with your sampled colors from the Swatches Palette.
Dither: Noise
Note: If you don’t like the way it looks, cancel the conversion and add more brush marks to your liking. Try not to get huge areas of one shade. Coverage should be nice and even.

Digital Camo Swatch
Step 4. Now we have to enlarge the image to the size that we want to work with. Go to Image>Image Size and set your options to this
Document Size
Width: 8
Height: 10
Resolution: 300 pixels/inch
Check options Scale Styles, Constrain Proportions, Resample Image
Don’t forget to change to CMYK or RGB mode, whichever mode you’re going to be working in.

Fort Drum Cover Comp
There you have it, your own digital camouflage pattern.
Now you know, and knowing is half the battle! Take the method and improve on it. I’ve already been messing with it for a cover that I’ve been working on.