Digital Camouflage Tutorial (PS)
What’s up everybody, this is the first tutorial I’ve ever posted anywhere. Let me know what you think. This digital camo tutorial isn’t perfect, but there aren’t too many good versions that I’ve found online.

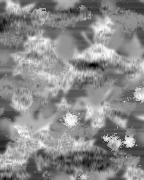
Nasty Mess
Step 1. Create a new Grayscale document at 2”x2.5” at 72 DPI. Fill it with some kind of messy pattern or scatter brush. Use a white background and brush something on top of it in black and 55% black. Do any combination of blurs or effects to your pleasing, just make sure there is a good range of shades. Only use black, white and gray. Typically, camouflage patterns use about 3 different colors.

Sampled Colors
Step 2. Next we’ll have to add our own swatches for the color of the camouflage. You can use any color you want, but as an example I’ll be using a sample I found online.
We’re going to add some Gausian Blur to get some nice even colors. Typically,
there are only 3 colors you’re going to be sampling. You’re going to have a light color, dark color and a middle color. Use the Eyedropper tool to sample and add these colors to your swatch list. Do this by choosing the Eyedropper tool, clicking on your color, then click the New Swatch button at the bottom of your Swatches palette.

Indexed Image
Step 3. Go back to your original file. We’re going to convert the image to Index Mode by going to Image>Mode>Index. Use these settings:
Palette: Local (Perceptual)
Colors: 3
Forced:
Custom… (Click on the first 3 swatches and replace these
with your sampled colors from the Swatches Palette.
Dither: Noise
Note: If you don’t like the way it looks, cancel the conversion and add more brush marks to your liking. Try not to get huge areas of one shade. Coverage should be nice and even.

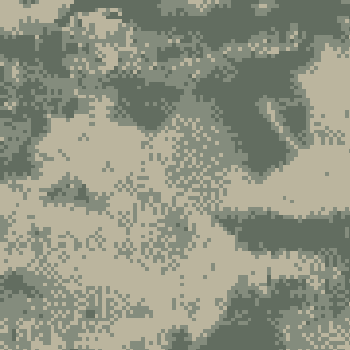
Digital Camo Swatch
Step 4. Now we have to enlarge the image to the size that we want to work with. Go to Image>Image Size and set your options to this
Document Size
Width: 8
Height: 10
Resolution: 300 pixels/inch
Check options Scale Styles, Constrain Proportions, Resample Image
Don’t forget to change to CMYK or RGB mode, whichever mode you’re going to be working in.

Fort Drum Cover Comp
There you have it, your own digital camouflage pattern.
Now you know, and knowing is half the battle! Take the method and improve on it. I’ve already been messing with it for a cover that I’ve been working on.
April 24, 2009 at 1:41 pm
Good way to make a camouflage, good!
April 30, 2009 at 6:38 pm
Appreciate it. Glad you like the method.
April 30, 2009 at 8:55 am
brother,
your first venture itself is great. We expect more in future. Allah will give you more skill and knowledge.
regards
April 30, 2009 at 6:38 pm
Thank you. There’s gonna be more to come.
June 25, 2009 at 9:59 am
By the way, you can use Render > Clouds filter to generate random spots on Step1.
June 29, 2009 at 10:16 pm
That’s very true, but you also need some random high-contrast spots in order to achieve a less graduated pattern seen in the real acu marpat patterns.
June 25, 2009 at 10:00 am
Oh, and thanx for your tutorial. Useful one.
June 25, 2009 at 2:26 pm
Awesome job! Wondering if you could do like a blend from the new Air Force ABU pattern into the Marines MARPAT (woodland) digital camo pattern? I’d appreciate it! Keep up the awesome work.
June 29, 2009 at 10:20 pm
Tim, you can achieve that effect by adding a few longer brush strokes during step 1. Just try to mimic the tiger stipe effect with whatever brush you’re using.
July 17, 2009 at 5:09 pm
I am not getting a settings menu for step 3 when I choose index color. Can anyone tell me how to do this is CS4? Thanks in advance.
August 5, 2009 at 3:27 pm
Tracy, try converting your image to RGB before switching to index mode.
April 23, 2010 at 4:49 am
This is a very good tutorial…If you are looking for digital camo like that of the US ARMY here is a tutorial for that…http://www.afreeland.com/index.php?page=DigtalCamo_Photoshop
June 11, 2010 at 12:06 am
When I try to change my image mode to Indexed Color, Photoshop won’t let me use 3 colors. I get a Photoshop dialog stating “An integer value between 217 and 256 is required. Closest value inserte.” and it changes my Colors setting to 217. Is there some trick to getting it to accept 3 as a valid input? Thanks!
June 14, 2010 at 5:39 am
Lex, make sure your palette is “Forced” to use only your 3 colors.
November 2, 2010 at 6:41 pm
I’ve noticed that there is some actually sort of pattern to the digicamos I’ve seen. The pattern resembles spots, stripes, and leaf patterns like…you know… animals and plants.
So, if one were to stroke tiger stripes, hyena spots and tree branch leaves and then have them overlap each other before moving to STEP 2, you’d probably get close to the real digicamo.